

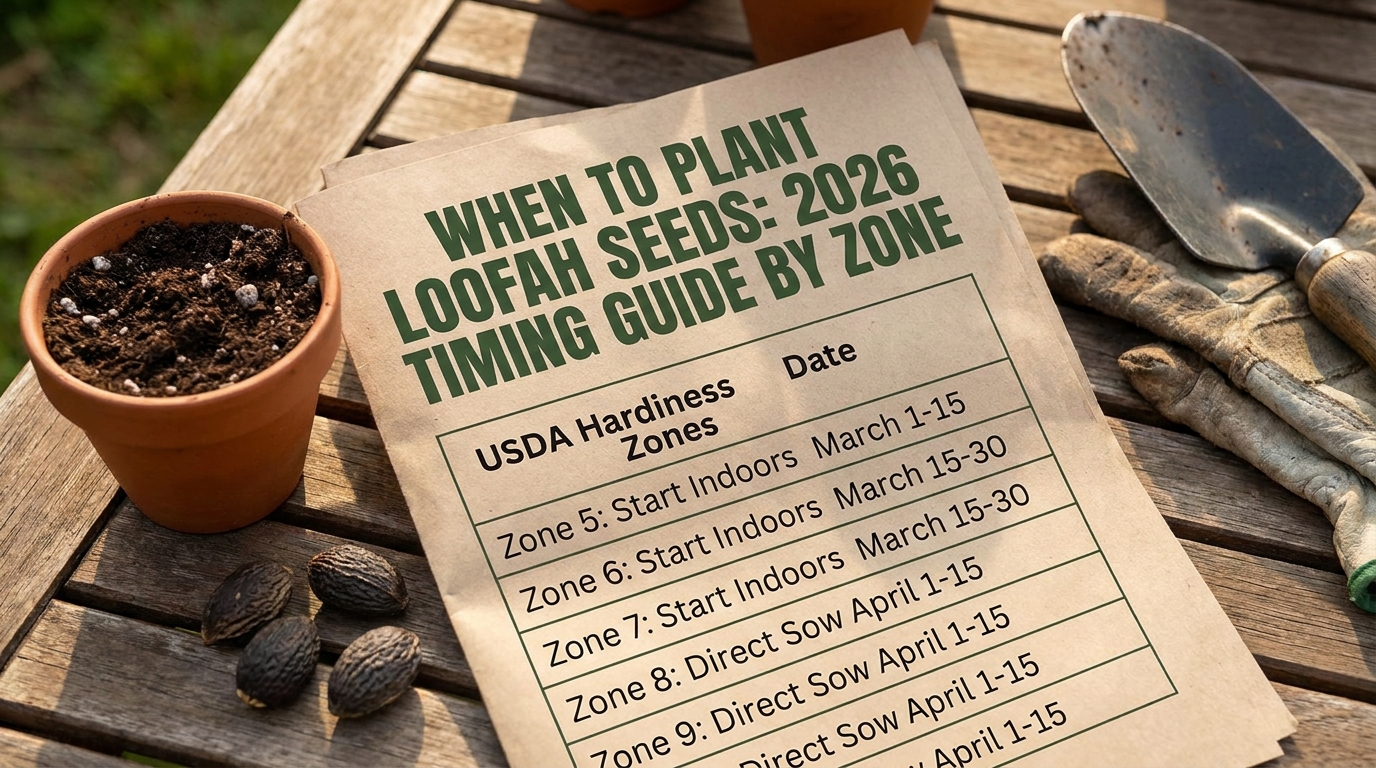
You bought a packet of luffa seeds hoping to grow your own sustainable bath sponges, but two weeks later, your seed pots are completely empty. Loofah seeds are notoriously stubborn and require very specific environmental triggers to break their deep dormancy. Without the right mechanical and thermal preparation, you will waste weeks staring at wet dirt while your growing season slips away.
Figuring out exactly how to germinate loofah seeds transforms a frustrating waiting game into a highly predictable 7-day process. These heavy gourds originate in tropical and subtropical climates, meaning they demand intense, consistent warmth to wake up. Their incredibly thick, black seed coats evolved to survive harsh dry seasons and will not sprout in cold, wet spring soil. You essentially have to trick the seed into thinking a tropical monsoon season has arrived. By combining physical scarification with a dedicated soaking period, you strip away the natural chemical inhibitors preventing growth. Adding a targeted seedling heat mat provides the final environmental push required for the embryo to expand. Standard room temperature simply will not cut it for these heat-loving vines. Mastering this exact initial step is critical for anyone hoping to harvest fully mature sponges before the first autumn frost hits your garden.
Why Are Loofah Seeds So Difficult to Sprout?
Understanding how to germinate loofah seeds starts with examining their unique physical structure. The seeds are enclosed in a hard, armor-like black casing designed by nature to withstand months of drought. This protective shell is nearly impervious to standard soil moisture.
When a seed drops in the wild, it waits for extreme tropical rains to physically wear down that outer shell. In a typical home gardening setup, dropping a dry seed into standard potting mix simply does not provide enough friction or water pressure. The moisture cannot penetrate the barrier to reach the embryo inside.
Because of this evolutionary trait,
If you skip the soaking phase, those chemicals signal to the embryo that it is not safe to grow yet. Temperature plays an equally important role in this biological lock. The seeds contain thermal sensors that tell them to stay dormant until the soil feels consistently hot.
How to Germinate Loofah Seeds: The Essential 3-Step Prep
If you want to know how to germinate loofah seeds with a massive 90% success rate, you must follow this exact preparation sequence. This protocol addresses all three natural barriers: the hard shell, the chemical inhibitors, and the thermal requirements.
Step 1: Mechanical Scarification (Nicking)
Scarification simply means scratching or breaking the outer seed coat. This allows water to immediately rush into the seed embryo.
Take a sharp pair of clean fingernail clippers or a metal file. Locate the pointed end of the loofah seed, which is where the root will eventually emerge. Very carefully snip off the absolute smallest fraction of that pointed tip. You only want to break the black shell, not crush the white fleshy interior.
If using clippers makes you nervous, gently rub the edges of the seed along a piece of medium-grit sandpaper. You will know you have sanded enough when you see a tiny sliver of white tissue peeking through the black casing.
Step 2: The Warm Water Soak
Once the shell is breached, the seed needs deep hydration. Fill a small glass jar or bowl with very warm, but not boiling, water. Distilled or filtered water works best to avoid municipal chlorine.
Drop your scarified seeds into the warm water. They will likely float at first, which is completely normal. Leave them in this water for 24 to 48 hours.
Check the water twice a day and replace it if it gets cloudy or cold. By the end of the second day, most of the viable seeds will sink to the bottom of the jar. They should look noticeably plumper and thicker than they did when dry.
Step 3: Heat Application
Hydration alone is not enough to force a sprout. The final biological trigger is continuous bottom heat.
If you are moving the soaked seeds directly into soil, those pots must sit on a horticultural heat mat. The soil needs to stay above 70°F around the clock. Placing pots on a sunny windowsill is inadequate because glass windows get incredibly cold at night, shocking the seeds back into dormancy.
How to Germinate Loofah Seeds with the Paper Towel Method
Many home gardeners ask how to germinate loofah seeds without planting them directly in dirt right away. The paper towel method is highly recommended because it offers instant visual confirmation that your seeds are viable. You never have to guess what is happening underground.
To begin, complete the nicking and soaking steps outlined above. After 48 hours in water, remove the swollen seeds.
Take a thick, high-quality paper towel and dampen it thoroughly. Wring out the excess water so the towel feels like a wrung-out sponge, not a dripping rag. Lay the towel flat on your counter.
Arranging the Seeds
Place your soaked loofah seeds on one half of the damp paper towel. Space them about an inch apart so their roots do not tangle when they sprout. Fold the other half of the towel over the seeds to cover them completely.
Slide this folded, seeded towel into a gallon-sized plastic ziplock bag. Do not seal the bag completely shut. Leave the zipper open about an inch to allow for essential air exchange and prevent stagnant fungal growth.
Monitoring for Taproots
Place the plastic bag directly onto your seedling heat mat. Keep the mat running 24 hours a day.
Check the bag every single morning. Open it up, touch the paper towel to ensure it is still damp, and look at the tips of the seeds. You can use a spray bottle to mist the towel if it starts drying out from the heat.
Within 3 to 7 days, you will see a thick, white taproot push out of the nicked end of the seed. Once this taproot is about half an inch long, the seed is ready for immediate planting in potting soil.
Planting Loofah Seeds Directly in Soil (Indoor Starting)
The traditional approach for how to germinate loofah seeds involves using a high-quality, sterile seed starting mix. This method is slightly slower than the paper towel trick, but it completely avoids the risk of damaging fragile taproots during a transfer.
Never use garden dirt from your yard for this process. Outdoor soil contains heavy clay, pathogens, and weed seeds that will easily outcompete a delicate loofah seedling. Purchase a bag of specialized seed starting mix containing fine peat moss or coconut coir and perlite.
Pre-moisten your soil mix in a large bucket before filling your pots. Dry peat moss repels water, and trying to water it from the top will just float your seeds away. The soil should feel slightly damp to the touch, similar to the texture of a crumbled chocolate cake.
Sowing Depth and Placement
Fill 3-inch or 4-inch plastic nursery pots with the moistened mix. Loofah plants hate having their roots disturbed, so starting them in slightly larger pots prevents the need for an intermediate repotting step.
Press one soaked loofah seed into the center of each pot. Push it down exactly half an inch into the soil. Cover the seed lightly and press the top of the soil down firmly to ensure good seed-to-soil contact.
According to guidelines from the
What Temperature Do Loofah Seeds Need to Sprout?
Temperature control is the absolute biggest secret behind how to germinate loofah seeds quickly and efficiently. These gourds require significantly more heat than standard garden vegetables like tomatoes or lettuce.
The ideal soil temperature for waking up a loofah seed is between 75°F and 85°F. If your soil temperature drops below 65°F, the seeds will stall out and simply rot in the wet dirt.
You cannot rely on your home’s central heating to achieve this. Even if your thermostat is set to 72°F, evaporation cools the wet soil in your pots, bringing the dirt temperature down into the low 60s.
The Importance of Heat Mats
Investing in a waterproof seedling heat mat is mandatory for northern gardeners. These mats raise the root zone temperature 10 to 20 degrees above the ambient room temperature.
Place your seed trays directly on the mat as soon as they are sown. Keep the heat mat plugged in constantly, day and night, until the seedlings have developed their second set of true leaves.
If you are using a humidity dome, keep a close eye on the condensation. High heat combined with extreme moisture creates a breeding ground for mold. Crack the vents on your dome slightly to allow excess heat and moisture to escape if the plastic becomes completely opaque.
Framework: Comparing Loofah Germination Methods
Evaluating exactly how to germinate loofah seeds requires looking at the specific trade-offs of different starting mediums. No single method is perfect for every gardener, and your choice depends on your indoor space and climate.
This comparison matrix breaks down the four primary strategies used by successful gourd growers:
Most backyard gardeners in temperate climates will experience the best results combining the paper towel method with an immediate transfer to sterile potting mix. Direct sowing is highly discouraged unless you live in zone 9 or above, as the soil rarely warms up fast enough to guarantee a harvest.
How Long Does It Take to Germinate Loofah Seeds?
When you properly execute the steps for how to germinate loofah seeds, you dramatically reduce the frustrating waiting period. Under optimal conditions, you can expect to see action remarkably fast.
If you scarify, soak, and use a heat mat, loofah seeds typically germinate in 5 to 10 days. The paper towel method often reveals white taproots in as little as 3 days.
However, if you skip the soaking process and plant dry seeds at room temperature, germination can take anywhere from 3 to 4 weeks. In many cases, unsoaked seeds planted in cool soil will never sprout at all.
Tracking the Timeline
Day 1 to 2: Seeds are soaking in warm water, swelling as they absorb moisture.
Day 3 to 5: The black seed coat splits open. A thick white taproot pushes outward.
Day 6 to 8: The taproot anchors into the soil. The green cotyledons (first leaves) begin pushing up through the dirt.
Day 10 to 14: The thick green stem straightens out, and the first set of true, jagged loofah leaves begins to form between the initial round leaves.
Common Mistakes When Starting Loofah Gourds
People researching how to germinate loofah seeds often stumble into a few highly predictable traps. Loofah plants are resilient once established, but their seeds are incredibly sensitive to environmental errors.
The most frequent mistake is overwatering the soil. While seeds need moisture to wake up, drowning them cuts off soil oxygen. A loofah seed sitting in muddy, waterlogged dirt will quickly succumb to bacterial rot and smell like sour milk.
Another major error involves nicking the wrong end of the seed. The pointed tip is where the root lives. If you clip the rounded, flat base of the seed, you risk damaging the delicate internal cotyledons while leaving the root trapped.
Managing Light Requirements
Many beginners assume seeds need intense light to germinate. Loofah seeds actually germinate perfectly fine in total darkness. The heat is what matters underground.
However, the absolute second that green loop of stem breaks the soil surface, the plant desperately needs intense, direct light. If you leave a sprouted seedling in a dark room or on a weak windowsill for even two days, it will become “leggy.“
Leggy seedlings stretch out tall and thin, desperately reaching for the sun. A stretched loofah stem becomes weak, brittle, and highly susceptible to snapping under its own weight or falling over from damping-off disease. Hang a full-spectrum LED grow light directly over your pots, keeping it just two inches above the leaves.
Transitioning Your Seedlings to the Garden
Knowing how to germinate loofah seeds is only the very first phase of your backyard growing journey. Once your seedlings are about four inches tall with two sets of true leaves, they must be prepared for the outdoor world.
You cannot move an indoor seedling directly into the harsh garden sun. The plant will suffer severe sunburn, turn white, and die within 48 hours. You must practice a process called hardening off.
Hardening off involves slowly introducing your tender indoor plants to outdoor wind, sun, and temperature swings. This physical stress forces the plant to thicken its cell walls and build a stronger stem.
The Hardening Off Schedule
Begin by placing your pots outside in deep, fully protected shade for just one hour. Bring them back inside to their heat mat.
On day two, leave them in the shade for three hours. By day four, introduce them to one hour of gentle morning sunlight. Gradually increase their sun exposure and outdoor time over a full seven to ten days.
Once they can survive a full day of direct sun without wilting, they are ready for their permanent home. According to the
Frequently Asked Questions
We compiled the most common questions regarding how to germinate loofah seeds to help you troubleshoot your specific home setup.
Can I germinate loofah seeds without a heat mat?
Yes, but your success rate will drop significantly. If you lack a heat mat, place your seed pots on top of a warm appliance, like a refrigerator or a hot water heater, which naturally radiates gentle bottom heat.
Which side of the loofah seed do I nick?
Always nick the slightly pointed end of the seed. This narrow tip is where the taproot sits just beneath the surface, waiting to break free.
Should I soak loofah seeds in hydrogen peroxide?
A very mild hydrogen peroxide solution (one teaspoon of 3% peroxide per cup of water) can help kill surface mold spores during the soaking phase. It also provides an oxygen boost to the water, which encourages faster sprouting.
Why are my loofah seeds molding instead of sprouting?
Mold usually indicates cold, stagnant, excessively wet conditions. Ensure your heat mat is running, remove any plastic humidity domes to increase airflow, and stop watering until the top layer of soil feels dry.
Do loofah seeds need light to germinate?
No, the seeds do not require light while they are buried under the soil. However, the moment the green stem emerges from the dirt, they require 14 to 16 hours of intense overhead light daily.
Can you save seeds from a store-bought natural loofah?
Sometimes, if the loofah was minimally processed. However, many commercial sponges are treated with chemicals or bleached, which destroys seed viability. For the best overview on sourcing, read our guide on
What is the ideal soil pH for starting these seeds?
Loofah plants prefer a slightly acidic to neutral soil environment. A standard seed starting mix naturally hovers around a pH of 6.0 to 6.8, which is perfect for optimal nutrient uptake.
Conclusion
Mastering exactly how to germinate loofah seeds sets the entire foundation for a massive, productive autumn harvest. These vines require a long, hot growing season, and losing three weeks to failed germination often means frost will kill your gourds before they fully mature into fibrous sponges. By actively breaking the tough outer shell, deeply hydrating the core, and applying consistent bottom heat, you take total control over the sprouting timeline.
Always start two or three times more seeds than you actually have room to grow. This accounts for natural failure rates and ensures you only plant the absolute strongest, fastest-growing vines in your yard. As your seeds finish their soaking phase and push out their first white roots, shift your attention immediately to your garden architecture. Loofah gourds grow incredibly heavy, and a flimsy tomato cage will collapse under their weight by August. Use this brief indoor growing window to build a sturdy, permanent trellis system so you are fully prepared when it is time to move your healthy new seedlings outside.